Kenmore Mini Ultra Sewing Machine Manual: A Comprehensive Guide
This manual provides detailed instructions for the Kenmore 71 and 385.19601 models, covering basic operations and advanced techniques.
It also includes information on the Jupiler Pro League schedule for 2025/2026.
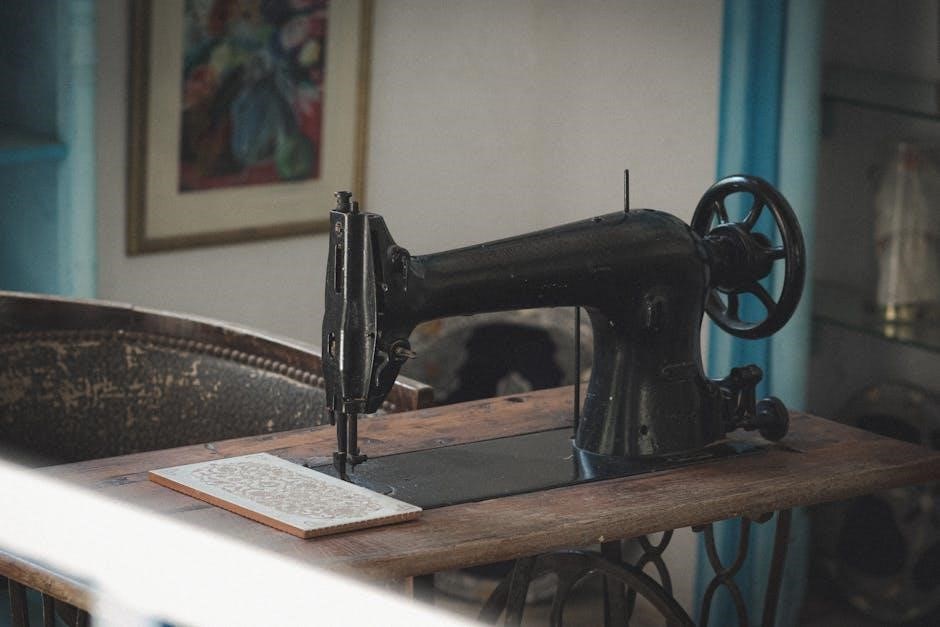
Welcome to the world of portable sewing! The Kenmore Mini Ultra sewing machine is designed for convenience and ease of use, perfect for quick repairs and small projects. This compact machine, as detailed in manuals for models like the Kenmore 71 and 385.19601, offers a surprising amount of functionality in a small package.
Whether you’re a beginner or an experienced seamstress, this guide will help you unlock the full potential of your machine. Beyond sewing, information sources also curiously mention the Jupiler Pro League’s 2026 schedule and live scores – a rather unexpected connection! However, our focus remains firmly on mastering your Kenmore Mini Ultra, ensuring smooth stitching and creative possibilities. Prepare to explore its features and embark on your sewing journey!
Understanding the Machine’s Features
The Kenmore Mini Ultra boasts a range of features despite its compact size. Manuals, referencing models like the 71 and 385.19601, highlight its ability to perform both straight and zigzag stitches, catering to diverse sewing needs. It’s designed for handling various fabric types, though heavier materials may require adjustments.
The machine’s simplicity is a key advantage, making it ideal for beginners. While exploring resources, we encountered mentions of the Jupiler Pro League – seemingly unrelated, yet present in the broader online landscape! Focusing back on the sewing machine, understanding the stitch length and width controls is crucial for achieving desired results. Accessory compatibility, including presser feet, expands its versatility, as detailed in accompanying guides.
Safety Precautions
Prioritize safety when operating your Kenmore Mini Ultra. Always disconnect the power source – whether batteries or adapter – before threading, changing the needle, or performing any maintenance. Keep fingers away from the moving needle and other machine parts during operation.
Never force the fabric; let the machine feed it naturally. Be mindful of electrical safety, ensuring the adapter is properly grounded. While researching, we noted information about the Jupiler Pro League schedule, an unexpected digital detour! Returning to safety, supervise children when the machine is in use and store it securely when not in operation. Regularly inspect the power cord for damage. Following these precautions will ensure a safe and enjoyable sewing experience.
Setting Up Your Sewing Machine
Begin by carefully unboxing your Kenmore Mini Ultra, inspecting all components. Ensure you have the necessary power source and prepare for initial threading, referencing the manual.
Unboxing and Initial Inspection
Carefully remove your Kenmore Mini Ultra sewing machine from its packaging. Retain the box and packing materials for potential future transport or storage. A thorough initial inspection is crucial. Verify that all listed components are present, referencing the included parts list within the manual – typically including the machine itself, power adapter (if applicable), foot pedal, and assorted accessories like needles, bobbins, and presser feet.
Inspect the machine for any visible signs of damage incurred during shipping. Check for dents, scratches, or loose parts. Ensure the power cord (if included) is intact and free from fraying. Examine the needle plate and surrounding areas for any obstructions. Confirm the bobbin case is securely in place. If any damage or missing parts are discovered, immediately contact the retailer or Kenmore customer support for assistance. Document any issues with photographs for your records. A careful start ensures a smooth sewing experience.
Powering the Machine (Batteries/Adapter)
The Kenmore Mini Ultra sewing machine offers flexible power options. Depending on your model, it can operate using either standard batteries or an AC power adapter. If using batteries, insert the correct type (typically AA) into the designated battery compartment, observing the polarity markings (+ and -). Ensure the battery cover is securely fastened.
For adapter use, connect the adapter to the machine’s DC jack and plug it into a suitable power outlet. Verify the voltage compatibility – typically indicated on the adapter itself. Do not use an adapter with an incorrect voltage, as this could damage the machine. The machine should power on when the foot pedal is pressed. If it doesn’t, double-check the connections and battery installation. Remember to disconnect the adapter when not in use, and remove batteries for prolonged storage to prevent leakage.
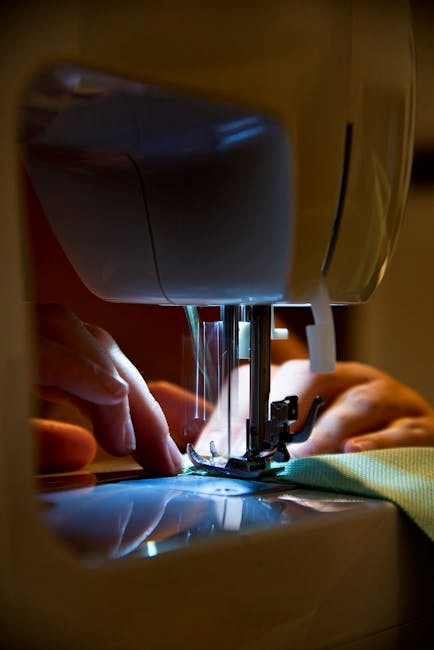
Threading the Needle
Correct threading is crucial for proper sewing machine operation. Begin by ensuring the machine is turned off. Raise the presser foot – this opens the tension discs. Follow the numbered threading path illustrated in your machine’s diagram (refer to the full Kenmore 71 or 385.19601 manual for specifics). Typically, this involves guiding the thread from the spool pin, through the tension discs, and down to the take-up lever.
Next, thread the needle from front to back (unless otherwise specified in your manual). A needle threader can be helpful, especially with fine threads. Pull several inches of thread through the needle eye. Finally, raise the needle to its highest position and gently pull the thread through, ensuring it’s properly seated in the tension discs. Incorrect threading can cause skipped stitches or thread breakage. Always re-thread if experiencing issues.
Basic Sewing Operations
Mastering fundamental techniques is key. This section details winding the bobbin, straight stitching, and zigzag stitching, essential for projects utilizing the Kenmore models.
Winding the Bobbin
Preparing the bobbin is the first step to successful sewing. Begin by placing the thread spool on the spool pin, ensuring it rotates freely. Guide the thread through the thread guides, following the machine’s diagram – typically found within the Kenmore 71 or 385.19601 manual.
Next, thread the end of the thread through the bobbin winder tension disc. Securely place an empty bobbin onto the bobbin winder spindle. Engage the bobbin winder by pushing it to the right. Gently press the foot pedal to start winding.
Monitor the winding process, allowing the bobbin to fill evenly. Once full, the bobbin winder will automatically stop. Cut the thread, and remove the bobbin. Proper winding ensures consistent stitch quality, vital for both simple and complex projects, even alongside tracking Jupiler Pro League schedules!
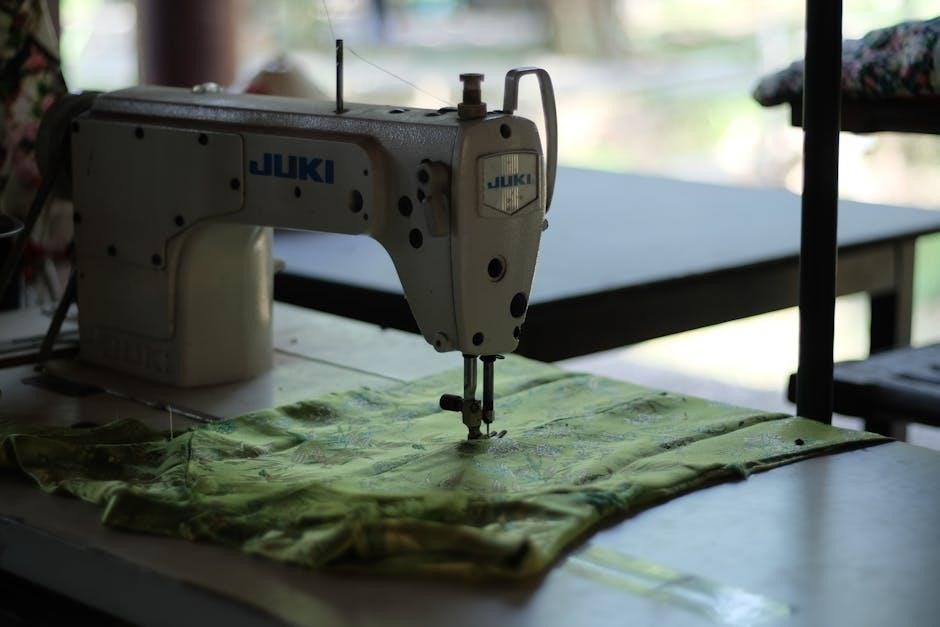
Straight Stitching
Mastering the straight stitch is fundamental to sewing with your Kenmore Mini Ultra. After threading the machine and inserting the bobbin (refer to previous sections in the manual, like the Kenmore 71 or 385.19601 guides), select the straight stitch setting on the stitch selector dial.
Place your fabric under the presser foot, lowering it gently to secure the material. Begin sewing by slowly pressing the foot pedal. Guide the fabric smoothly, maintaining a consistent speed. Avoid pulling or pushing the fabric; let the machine feed it through.
For a neat finish, backstitch at the beginning and end of your seam. This secures the stitches. Practice on scrap fabric to achieve even, consistent lines. Remember, patience is key, even when also following the Jupiler Pro League standings!
Zigzag Stitching
The zigzag stitch offers versatility beyond a simple straight seam on your Kenmore Mini Ultra. Select the zigzag stitch setting on your machine’s stitch selector – consult your Kenmore 71 or 385.19601 manual for precise dial positioning. Adjust the stitch width using the designated dial; wider settings create broader zigzag patterns.
This stitch is ideal for finishing raw edges to prevent fraying, creating decorative elements, or sewing stretch fabrics. Practice on scrap material to understand how different width settings affect the appearance and functionality.
Maintain a consistent sewing speed and guide the fabric gently. Like straight stitching, backstitch at the beginning and end. While practicing, perhaps keep an eye on the Jupiler Pro League schedule for a break!
Advanced Techniques
Explore stitch adjustments, reverse stitching, and fabric variations with your Kenmore Mini Ultra. Consider the Jupiler Pro League schedule while mastering these skills!
Adjusting Stitch Length and Width
Mastering stitch customization unlocks creative potential with your Kenmore Mini Ultra. The stitch length dial controls the distance between each stitch, impacting fabric strength and appearance – shorter for delicate fabrics, longer for heavier materials. Similarly, the stitch width dial adjusts the zigzag stitch’s breadth, ideal for finishing raw edges or creating decorative effects.
Experimentation is key! Begin with default settings and gradually adjust to achieve desired results. Remember that different fabrics require different settings. Always test on a scrap piece before sewing your final project. Consider referencing the manual’s needle selection chart for optimal pairings. While perfecting your technique, perhaps check the Jupiler Pro League standings for a quick break – a little football can inspire precision!
Reverse Stitching
Reverse stitching, a crucial technique, secures seams at the beginning and end, preventing unraveling. Your Kenmore Mini Ultra features a dedicated reverse lever or button – engage it to switch direction. Typically, a few stitches backward are sufficient, but reinforce high-stress areas with more.
Practice smooth transitions between forward and reverse. Avoid abrupt stops, which can create bulky seams. Consistent pressure on the foot pedal ensures even stitching in both directions. Remember to disengage the reverse function after securing the seam. While focusing on precision, you might find a quick check of the Jupiler Pro League schedule a refreshing diversion. Mastering reverse stitching adds durability and a professional finish to all your projects!
Sewing Different Fabric Types
The Kenmore Mini Ultra, while compact, can handle a variety of fabrics, but adjustments are key. Lighter fabrics like silk or chiffon require finer needles and lower thread tension. Heavier materials, such as denim or canvas, demand stronger needles and increased tension. Always test on a scrap piece first!
Adjust stitch length accordingly; shorter stitches for delicate fabrics, longer for heavier ones. A walking foot can be invaluable for preventing slippage with tricky materials. Remember to consult the needle selection chart for optimal choices. While experimenting, perhaps check the Jupiler Pro League standings for a quick break. Proper fabric preparation and machine settings ensure beautiful, professional results with every project.

Troubleshooting Common Issues
Addressing problems like the machine not turning on, thread breakage, or needle issues is crucial. Check power, threading, and needle integrity – and the Jupiler Pro League!
Machine Not Turning On
If your Kenmore Mini Ultra fails to power on, several checks are necessary. First, verify the power source – are the batteries correctly installed with the proper polarity, or is the adapter securely plugged into both the machine and a functioning outlet?
Inspect the adapter itself for any signs of damage, such as frayed wires or a broken connector. If using batteries, ensure they are fresh and haven’t expired. A loose connection within the battery compartment can also prevent operation.
Sometimes, a simple reset can resolve the issue. Disconnect the power source (remove batteries or unplug the adapter), wait a few minutes, and then reconnect. Remember to also check the Jupiler Pro League schedule for upcoming matches while troubleshooting!
Thread Breaking Problems
Frequent thread breakage with your Kenmore Mini Ultra can be frustrating, but is often easily resolved. Begin by ensuring you’re using the correct type of thread for your fabric; heavier fabrics require stronger thread. Verify the machine is correctly threaded, following the manual’s diagram precisely – a misthreaded machine is a common culprit.
Check the needle; a bent, dull, or incorrect size needle can cause breaks. Replace it with a new needle appropriate for your fabric. Adjust the thread tension – too tight tension strains the thread, while too loose tension can cause looping and breakage;
Finally, ensure the bobbin is wound evenly and inserted correctly. Don’t forget to check the Jupiler Pro League standings while you re-thread!
Needle Breaking Issues
Experiencing broken needles with your Kenmore Mini Ultra? Several factors could be at play. First, always use the correct needle type and size for the fabric you’re sewing. Attempting to sew through thick or multiple layers with a fine needle is a common cause of breakage.
Ensure the needle is fully inserted into the needle clamp and is not bent or damaged. A bent needle should always be replaced. Check your thread path – obstructions or improper threading can put undue stress on the needle.
Avoid pulling or pushing the fabric while sewing; let the machine feed the fabric naturally. Finally, verify the presser foot is lowered, as sewing without it can cause the needle to strike the throat plate. Perhaps check the Jupiler Pro League schedule during downtime!
Maintenance and Care
Regular cleaning and oiling are crucial for longevity. Keep the machine free of lint and dust, and consider the Jupiler Pro League standings!
Cleaning the Machine
Maintaining a clean sewing machine is paramount for optimal performance and longevity. Before any cleaning, always ensure the machine is switched off and unplugged – or has batteries removed. Begin by using a brush, often included with your Kenmore Mini Ultra, to remove lint and dust from the bobbin area, feed dogs, and around the needle plate.
A small vacuum cleaner with a brush attachment can also be incredibly effective for reaching tight spaces. For stubborn lint, a slightly dampened (not wet!) cloth can be used, but avoid getting moisture into the internal mechanisms. Never use compressed air, as this can push debris further inside. Regularly cleaning after each use prevents build-up and ensures smooth operation, potentially avoiding issues like thread breaking – much like keeping up-to-date with the Jupiler Pro League schedule!
Oiling the Machine
Proper lubrication is crucial for the smooth functioning of your Kenmore Mini Ultra sewing machine. However, avoid over-oiling, as excess oil attracts dust and can cause more harm than good. Consult your manual for specific oiling points – typically, these include the bobbin case, hook assembly, and any areas where metal parts move against each other.
Use only sewing machine oil; other lubricants can damage the delicate mechanisms. Apply a small drop of oil to each designated point, and then operate the machine briefly to distribute the oil evenly. Wipe away any excess oil with a clean, lint-free cloth. Regular oiling, perhaps coinciding with tracking the Jupiler Pro League standings, prevents friction and ensures quiet, efficient sewing. Remember, a well-oiled machine is a happy machine!
Storage Recommendations
To prolong the life of your Kenmore Mini Ultra, proper storage is essential. Always unplug the machine and remove the batteries (if applicable) before storing it. Cover the machine with a dust cover to protect it from dust and debris – much like protecting a team’s position in the Jupiler Pro League standings!
Store the machine in a cool, dry place, away from direct sunlight and extreme temperatures. Avoid storing it in damp basements or hot attics. Keep all accessories together in a designated storage box or bag. Periodically check the machine for dust or corrosion, especially if stored for an extended period. Proper storage ensures your machine is ready for your next sewing project, just as consistent performance is key for any football league.

Accessories and Their Uses
Explore the presser feet, needle selection, and bobbin compatibility charts. These components, like players in the Jupiler Pro League, enhance machine functionality.
Presser Feet Guide
The Kenmore Mini Ultra sewing machine benefits greatly from utilizing the correct presser foot for each task. While the manual doesn’t detail specific feet beyond the standard, understanding their function is crucial. A standard zig-zag foot is versatile for most fabrics and stitches. For buttonholes, a buttonhole foot is essential for precise, consistent results.
A zipper foot allows for close stitching along zipper teeth, preventing damage. A satin stitch foot provides a smooth finish for decorative stitches. Consider acquiring additional feet as your sewing skills progress. Much like a team’s strategy in the Jupiler Pro League, selecting the right foot optimizes performance. Proper foot installation ensures secure operation and prevents skipped stitches. Always refer to the machine’s diagrams for correct attachment.
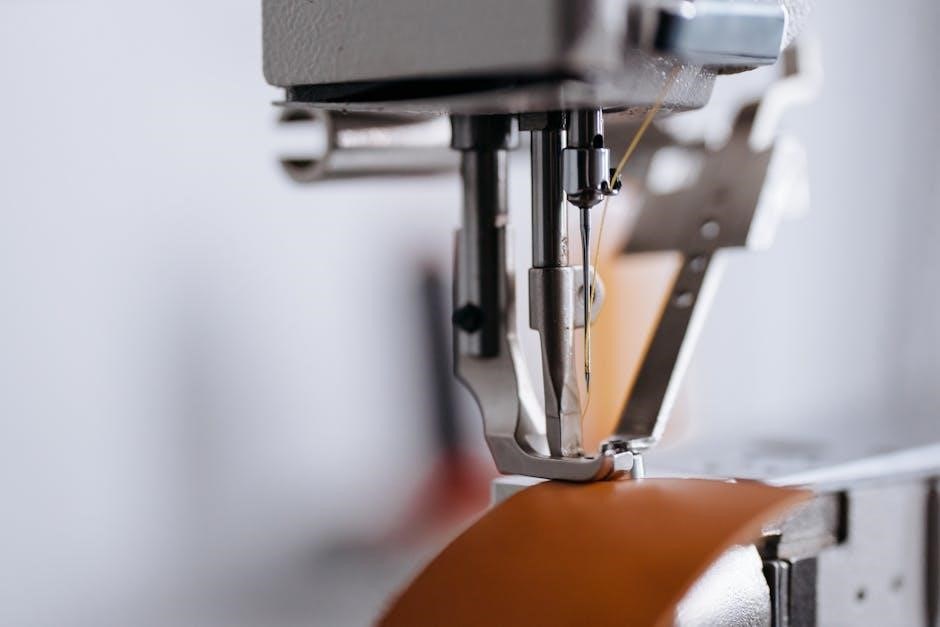
Needle Selection Chart
Choosing the correct needle is paramount for successful sewing with your Kenmore Mini Ultra. Universal needles (size 80/12, 90/14) work well for woven fabrics. Ballpoint needles (size 75/11, 90/14) are designed for knit fabrics, preventing skipped stitches and fabric runs. Denim needles (size 90/14, 100/16) are robust enough to penetrate heavy fabrics like denim and canvas.
Leather needles have a wedge-shaped point for piercing leather and suede. Sharps needles are ideal for fine, delicate fabrics like silk and chiffon. Similar to tracking player statistics in the Jupiler Pro League, needle size impacts performance. A dull or incorrect needle can cause thread breakage and damage fabric. Regularly replace needles for optimal results. Always consult the manual for recommended needle types based on fabric weight and type.
Bobbin Types and Compatibility
The Kenmore Mini Ultra utilizes a class 15 plastic bobbin, essential for smooth and consistent stitching. Metal bobbins are not compatible and can damage the machine’s internal components. Ensure the bobbin is wound evenly and not overfilled, as this can cause tension issues and skipped stitches.
Using a genuine Kenmore bobbin is recommended for optimal performance, mirroring the importance of accurate standings in the Jupiler Pro League. While generic bobbins may function, they can sometimes lead to inconsistent tension. Always check the manual for specific bobbin recommendations. Proper bobbin insertion is crucial; refer to the threading diagram. Regularly inspect the bobbin case for lint and debris, cleaning it as needed to maintain optimal sewing quality.